This guide includes directions on how to access the student view of class rosters and launch Progress Monitoring Assessments for individual students. Teachers are now able to launch each student assessment from the new “folder” button beside each student name on their class roster. We designed this student view screen to:
- Help teachers focus on a specific student
- Reduce errors with launching an assessment for the incorrect student from this page
- Teachers can clearly see which students still need to be assessed for the current wave
Video Demonstration:
Instructions:
Step
1
Log on to cliengage.org
Step
2
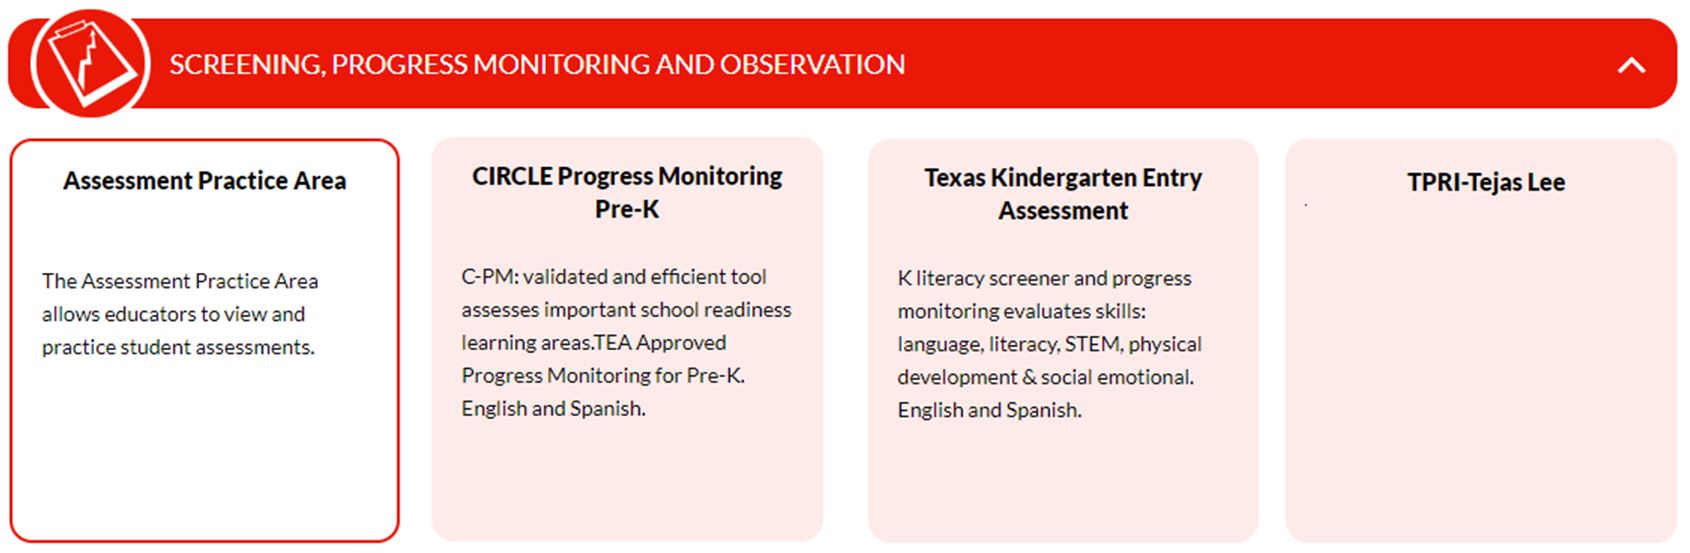
From the dashboard, locate the red banner Screening, Progress Monitoring, and Observation. Click on the assessment that you would like to use to assess, for example CIRCLE Progress Monitoring PreK, Texas Kindergarten Entry Assessment, or TPRI-Tejas Lee. The following screenshots show the steps for CIRCLE Progress Monitoring PreK, but the steps are the same for all the assessments on CLI Engage.
Step
3
Use the search criteria to locate your Community/District or School.

Click on the Class name.

Step
4
If your students’ Assessment Language is Spanish, click ‘Click to Assess in Spanish‘.

Step
5
Click on the folder of the student that you want to assess, under View Student.

Step
6
The folder opens to all the measures for one student, the student that was selected. Click the Play/Launch button for the measure that you want to launch, (i.e., Rapid Letter Naming).

Step
7
You can also select specific measures to launch. Click on the measures you want to select and they will become highlighted in blue. By clicking the Multi Launch button, under Launch Selected, the selected measures will launch consecutively.

**You also have the option to use Hide/Display Measures.
By clicking Hide/Display Measures, you can hide measures from view.

Unselect the measure you want to hide by clicking the name of the measure. The measure you unselect and want to hide will turn white. Then, click Save.

Selected measures will be hidden in your view. Note the exclamation point on the button indicates that some measures are hidden in your view.

Step
8
Whether you use Multi-Launch or click on one measure at a time, the first measure selected will launch and the Instructions page will appear. After reading the instructions and clicking Next, you can begin assessing.

Step
9
After you have completed the assessment, the next page is the scoresheet. You can review the scores and click Done or add a Comment.


Step
10.1
A Select Next Student window will open. You are able to continue assessing the same student by clicking Back to current student.

The folder will open back up for the current student. You can view the scores for that student or select another measure.

Step
10.2
Or select a different student from the drop down and click Next Student to move on to the next student.

This will open up the folder for the next student that you selected.

Step
11
Click Back to the Class View to return to your class roster.

View the scores for all students or click on the student’s folder that you want to assess next.

This document was last modified on: September 17, 2021