This guide will assist in creating accounts for teachers in your school, center, program, or community/district.
Instructions:
Step
1
Log in to https://cliengage.org
From the Dashboard, locate Administrative Tools and click on Class & Student Management.


Step
2
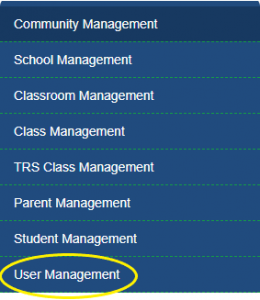
From the left side bar, click on User Management.
Step
3
Select Teacher

Step
4
There are two options to add a teacher to CLI Engage. The “Bulk Add/Update Teachers” option allows you to quickly create accounts for multiple teachers. You can also use the “Add Teacher” option to create accounts individually.
![]()
For more information on the “Add Teacher” option, skip to Step 9.
Step
5
Let’s add teachers using the “Bulk Add/Update Teachers” option. First, click this button:

Step
6
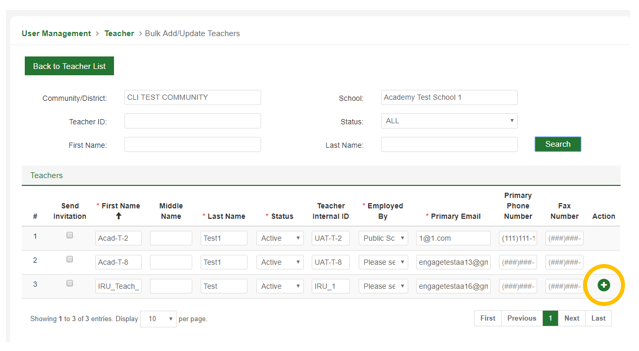
On the next screen, you will see a list of all teachers at your school/program that already have CLI Engage accounts. If needed, you can update their information here. To add a new teacher, click the green “+” button circled below.
Step
7
You will see another line added to the screen. You will enter the information for the new teacher here:

Step
8
Complete all required information for your teacher, marked with a red asterisk ![]() . Be sure to check the “Send Invitation” box for all new teachers. This will automatically send an email inviting the teacher to login to CLI Engage. You can also add additional teachers on this screen by clicking the green “+” button again. Or, click the blue “-” button to remove a teacher’s information.
. Be sure to check the “Send Invitation” box for all new teachers. This will automatically send an email inviting the teacher to login to CLI Engage. You can also add additional teachers on this screen by clicking the green “+” button again. Or, click the blue “-” button to remove a teacher’s information.
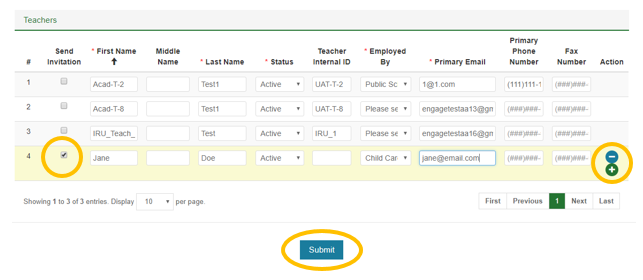
When ready, click the “Submit” button to save your information and create account(s) for your teacher(s).
Step
9
You can also add teachers individually. To begin, click on ‘Add Teacher’ from the Teacher screen (step 4).

Step
10
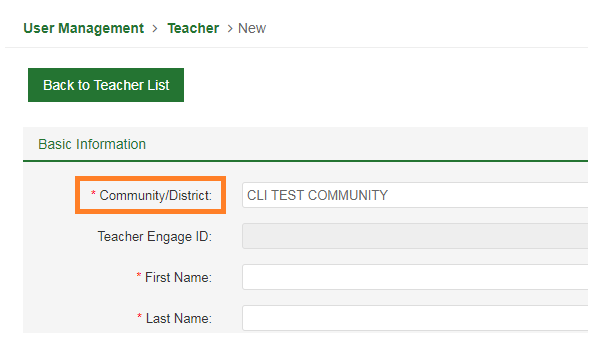
Select Community:
Step
11
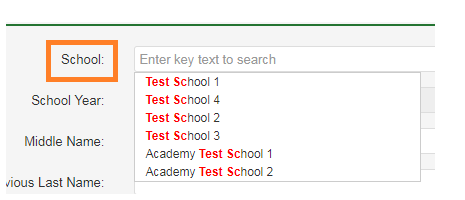
Select School:
Step
12
Type in all required information marked with a red asterisk ![]()
Step
13
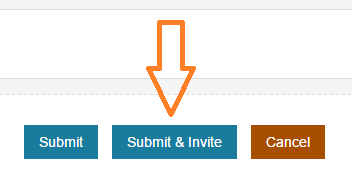
Submit and Invite the Teacher:
This document was last modified on: August 27, 2021
